Prontopaga Payment Gateway Configuration
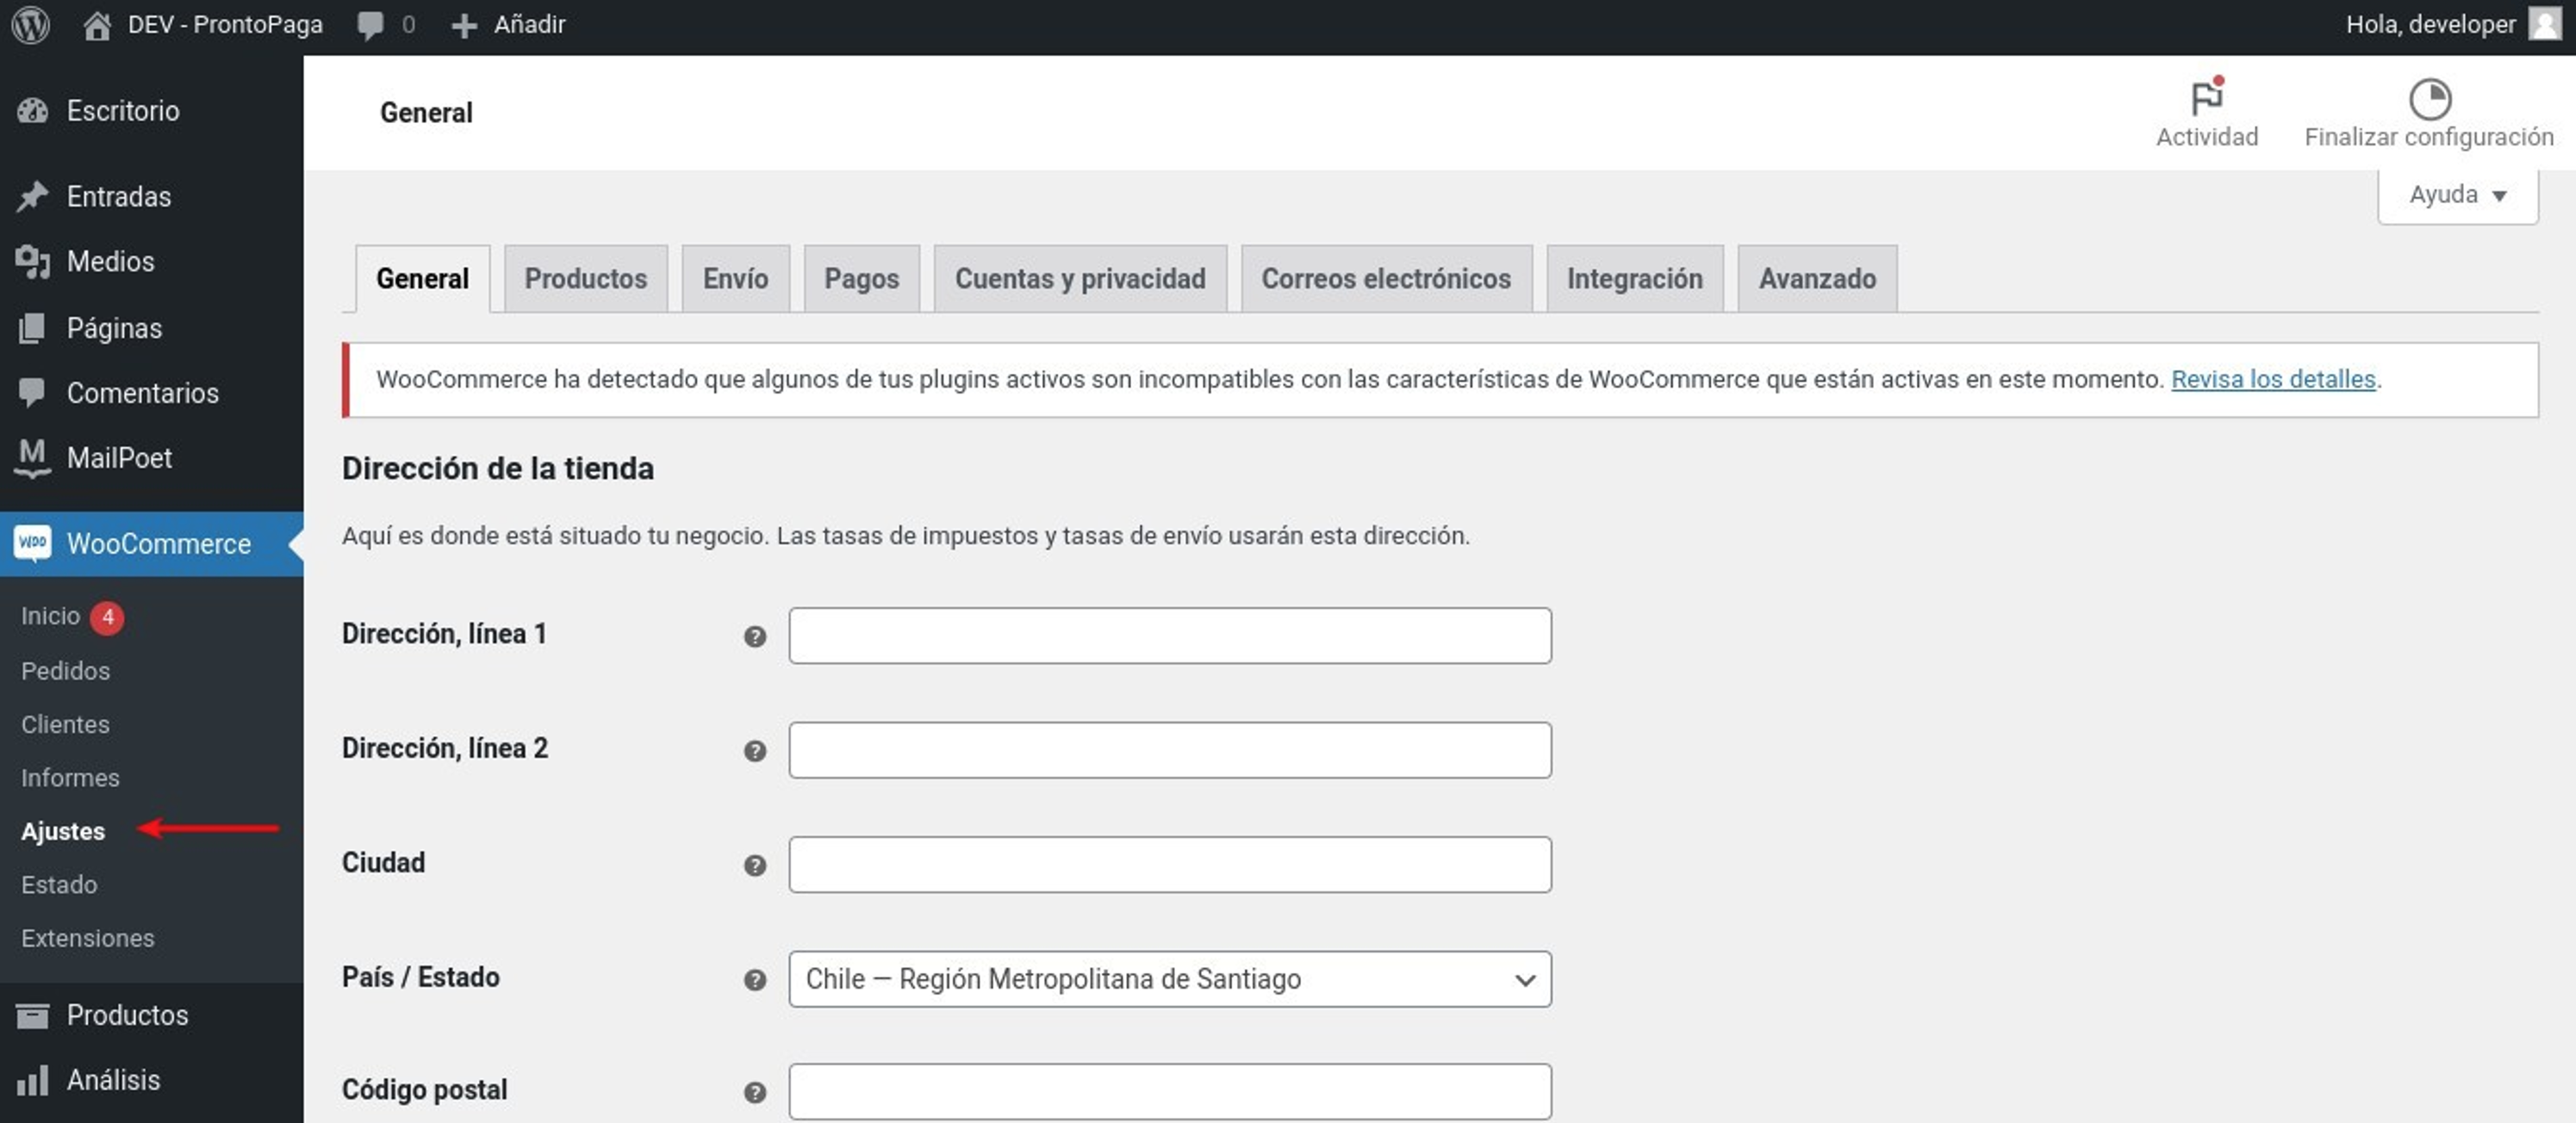
1. In the left sidebar locate the WooCommerce option, and click on the Settings menu item.
2. In the Settings view, locate the Payments tab. Upon entering, find in the list of payment methods the method BNC – Electronic Payment Interface, and select the Manage button.

3. Enter the configuration parameters:
- a. Enable the payment method.
- b. Commerce authentication token, provided by Prontopaga.
- c. API Key (secret key), provided by Prontopaga.
- d. Title, this controls the title that the user sees during checkout.
- e. URL, default value: https://sandbox.insospa.com/api/
- f. Description, this controls the description that the user sees during checkout.
- g. Image, this controls the image that is displayed when the payment method is deployed on the Checkout page.
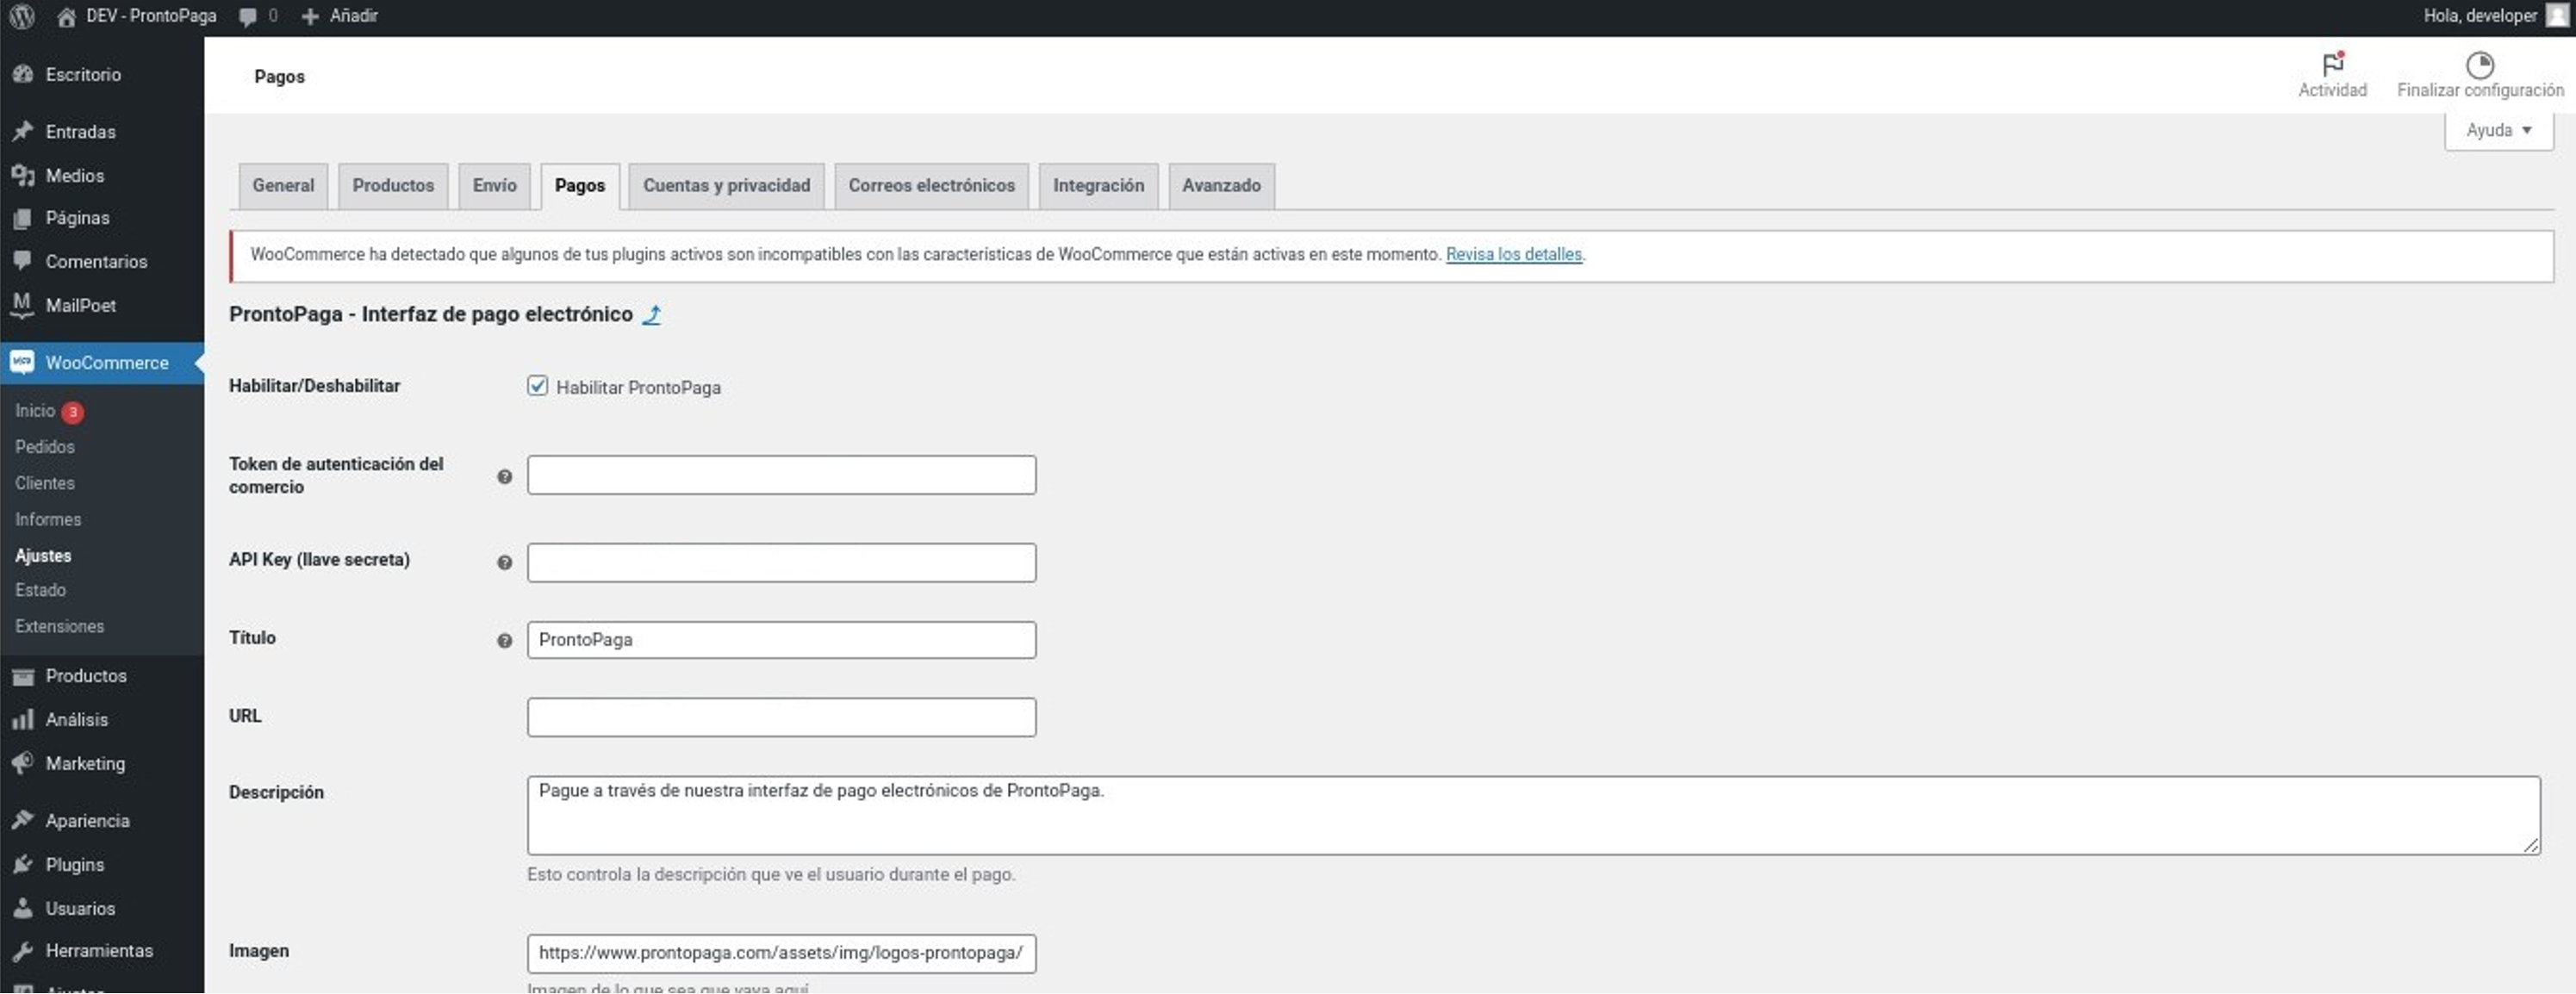
4. And then press the Save changes button.
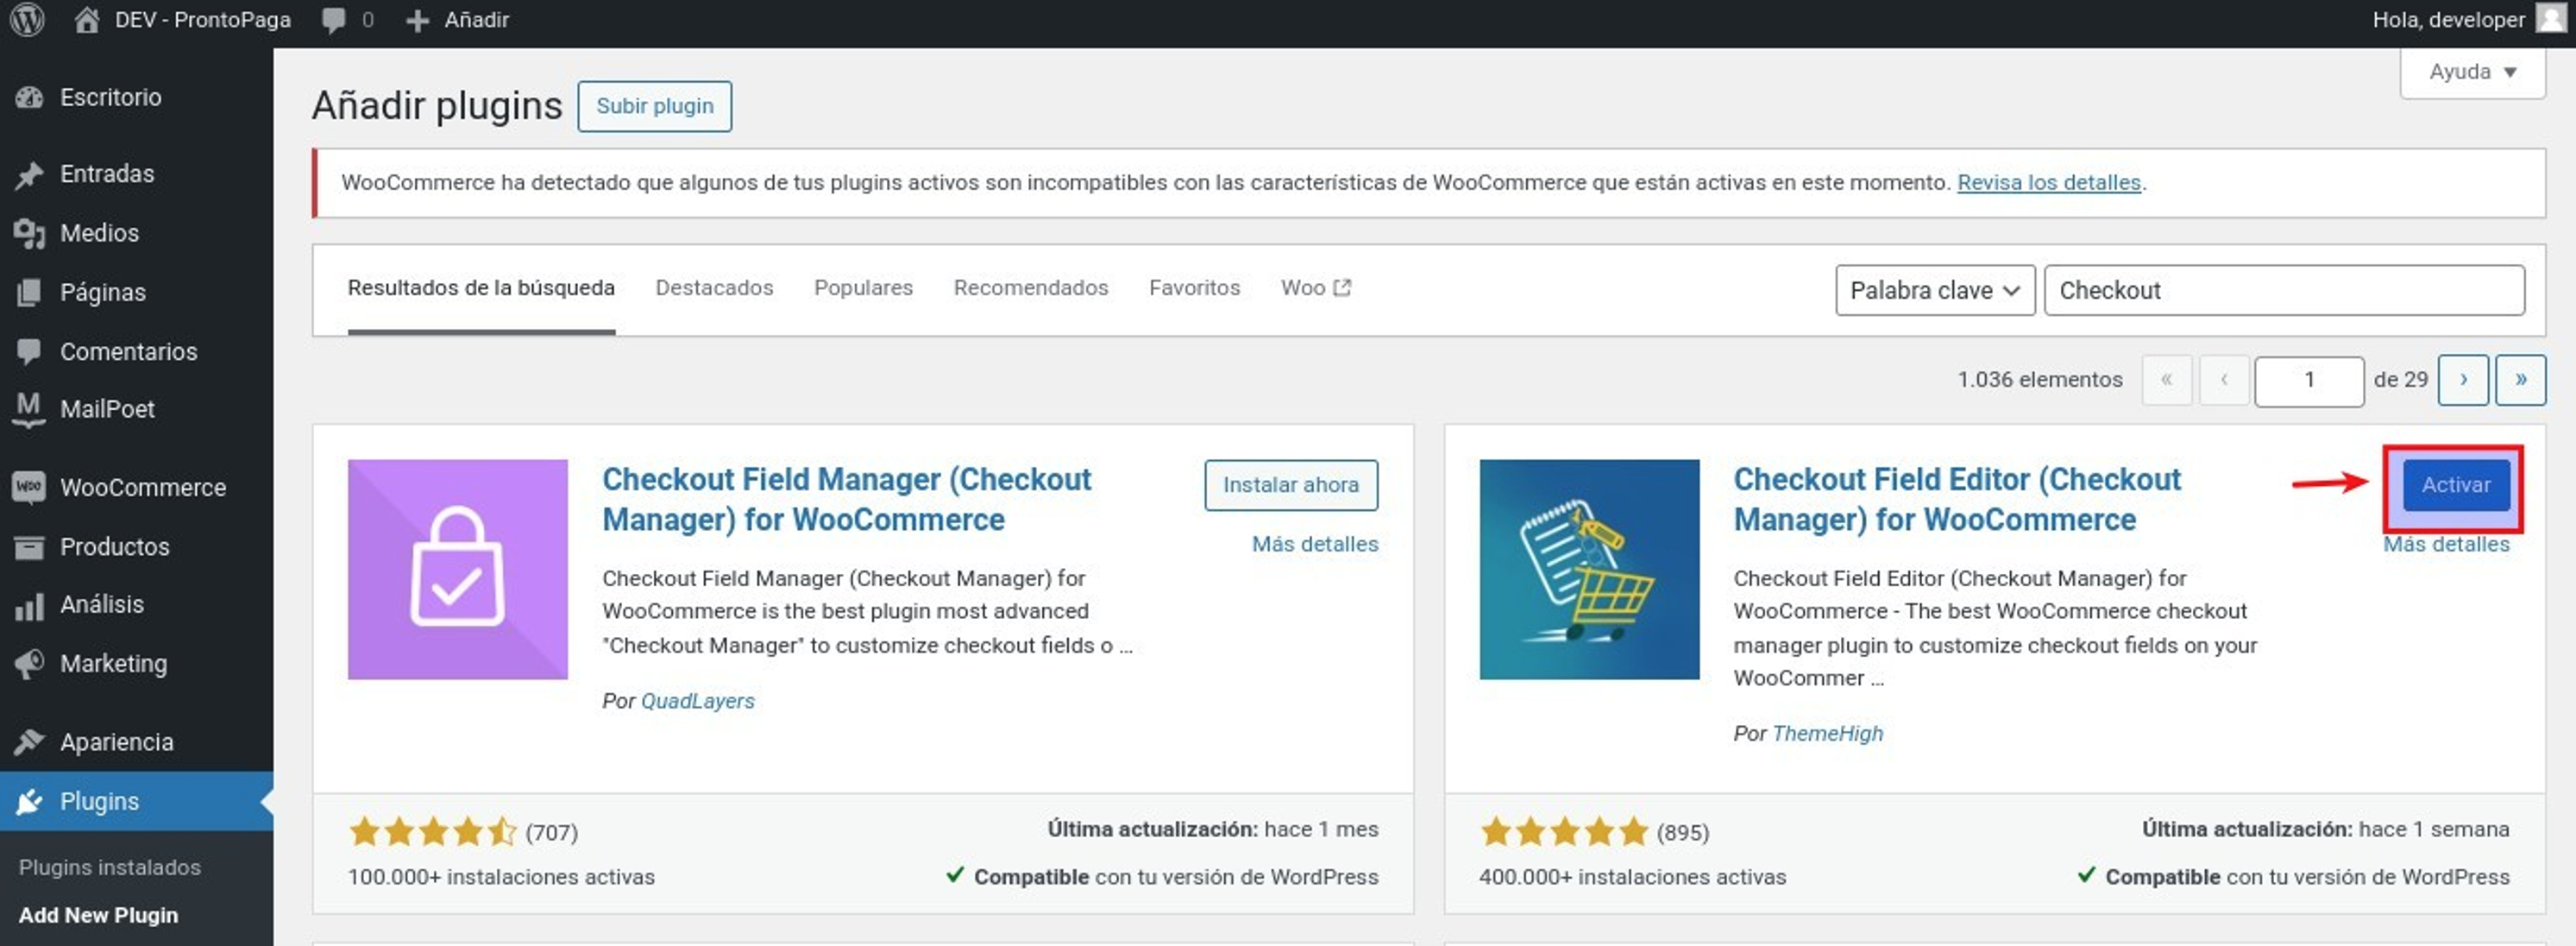
5. Now it's necessary to install a plugin to add a field to the checkout form. Therefore, it is recommended to install the Checkout Field Editor (Checkout Manager) for WooCommerce.
a. In the left sidebar locate the Plugins option, and click on the Add New Plugin menu item.
b. On the Add Plugins screen, enter the keyword Checkout in the search form field and press the Enter key to search for plugins. Then, locate the plugin in the list and click on the Install Now button, as shown in the image.

- c. Afterwards, click on the Activate button.
- d. Subsequently, in the left sidebar locate the WooCommerce option, and click on the Checkout Form menu item.

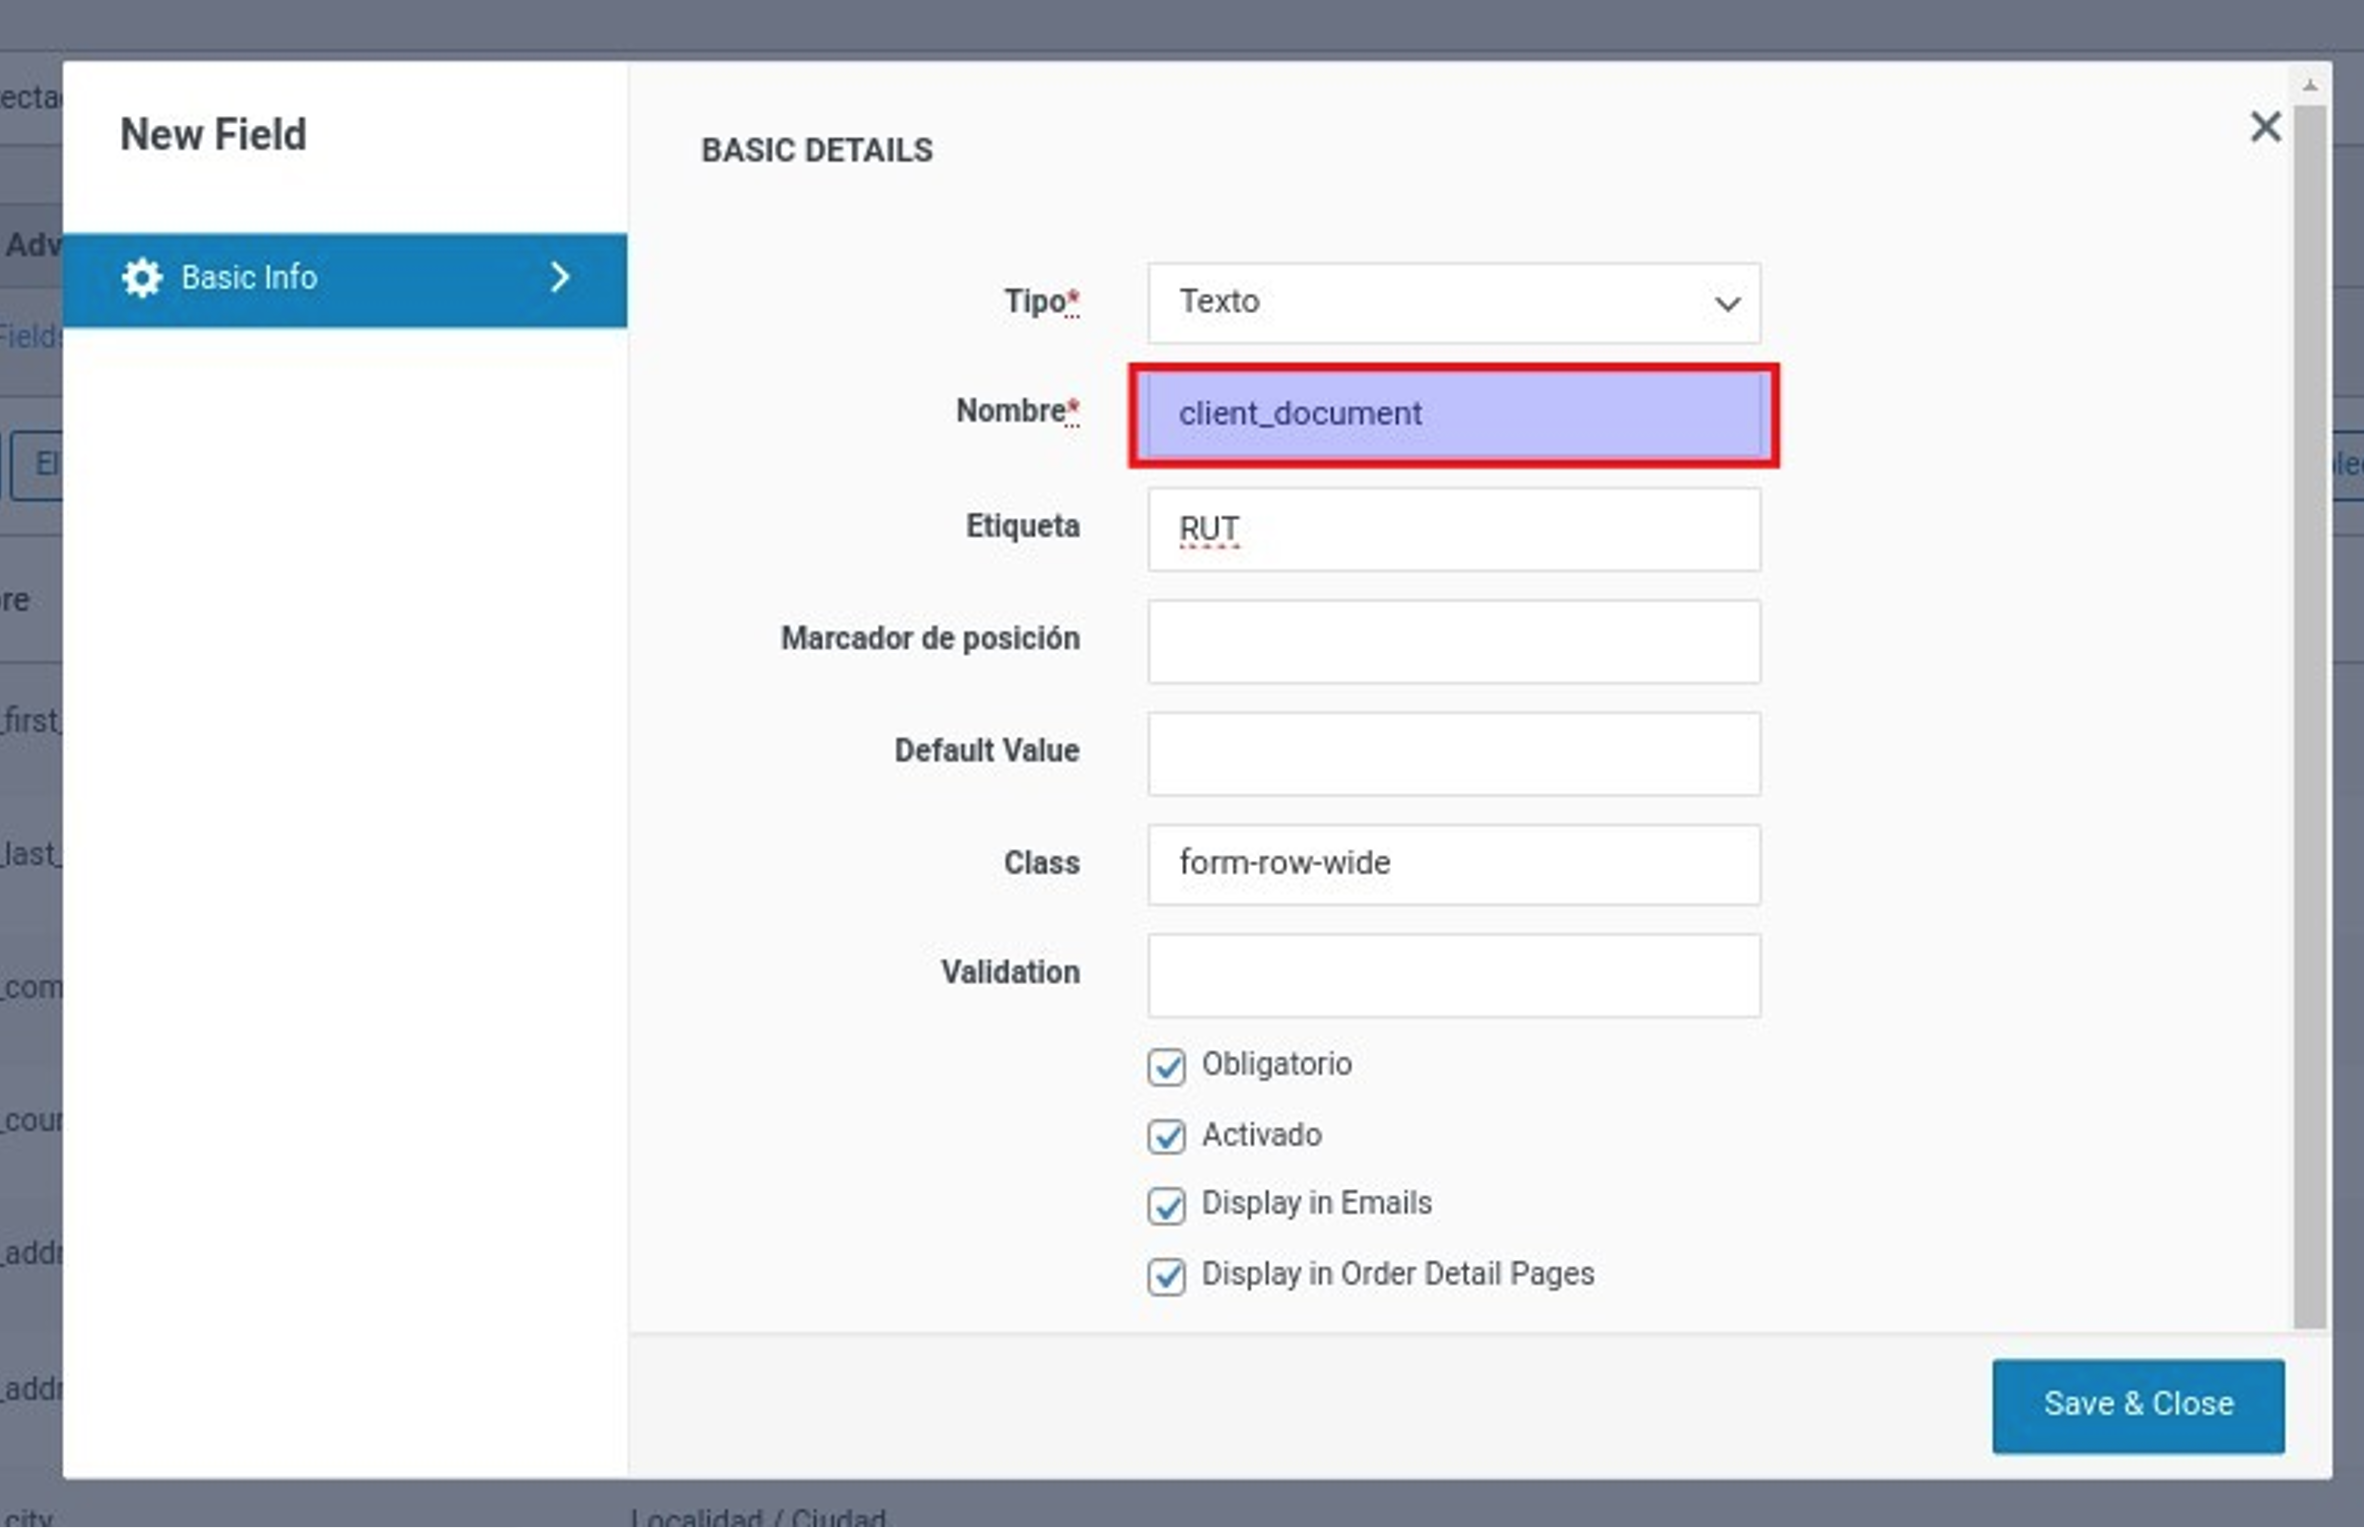
- e. Once on the screen, click on the Add Field button.
- i. In the New Field modal window, enter the term client_document in the Name field.
- ii. In the Label field, enter the description of the field, in this case, RUT.
- iii. And click on the Save button.